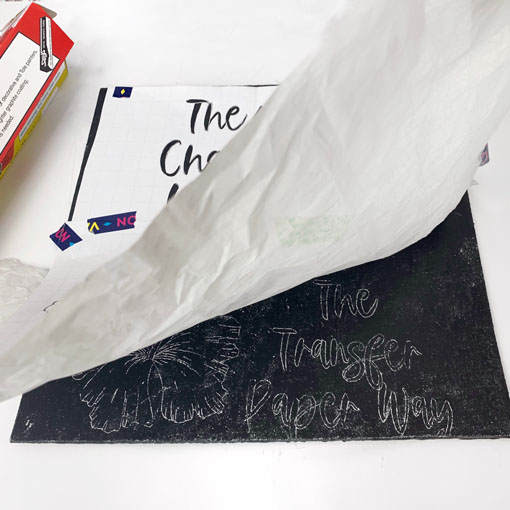
Let’s face it:
Transferring your own images and letters to a chalkboard sounds scary.
And to make them look pretty and professional?
That’s even scarier.
Well, I have good news for you:
In this post, I’m going to show you 3 fool-proof methods you can use to easily transfer your images and designs to a chalkboard (with no special skills required).
You’ll save time, make a super-professional sign, and feel great afterward.
Sound good?
Let’s get to it…
disclaimer.
Since we share a lot of how-to ideas with creative people like you, our content naturally may contain affiliate links with resources we love — this means if you click on a link and buy, we will earn a tiny bit of chalk money which we promise to use to create even more free content for you. 😁
too busy to read?
Watch the video to see transferring in action from start-to-finish.
jump ahead
1. transfer basics.
what is transferring?
Transferring is the process of copying a design from a printed piece of paper or digital image onto another canvas or medium, like chalkboard or wood, typically using transfer paper or a projector.
For example, let’s say you have a photograph or print an image you like on your home printer, that you want to draw on a chalkboard.
You would take a sheet of transfer paper and insert it between that printable and your chalkboard, and then simply trace on top of the printable.
why is transferring important?
Especially for non-artistic people.
what is transfer paper?
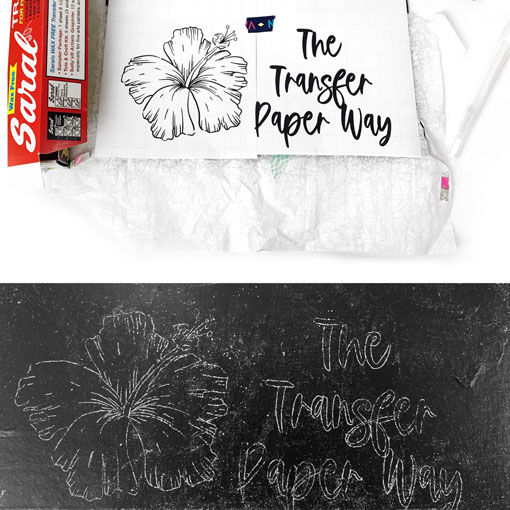
Transfer Paper — also known as tracing or graphite paper — is paper you insert between your printed design and canvas (i.e. chalkboard), that you trace over to leave an imprint of your design on your canvas.
what is tracing?
Tracing is outlining the borders, lines, and visual sections of artwork or calligraphy, using a writing utensil.
In the context of chalkboard transferring, tracing is done in two consecutive actions:
On top of a printed template to imprint the design on the underneath chalkboard (using either chalk or transfer paper).
On the chalkboard directly, over the markings from the printed template (using chalk markers or paint).
Bottom line:
You trace on top of a piece of paper to imprint the design on an underneath canvas (like a chalkboard).
Then you remove the paper template and trace again on the canvas to make your final design. 🚀
Don’t worry, it’s easier than it sounds.
Now that you know the basics, I’ll show you 3 separate ways — from cheapest to most expensive — that you can use to transfer any design to a chalkboard.
note.
Before you get started, make sure you prime your chalkboard — also known as ‘seasoning’ — by filling up the tiny empty spaces in your porous board with chalk. Just cover the whole board with the wide side of a piece of regular chalk (don’t use the tip), then simply dry erase.
2. the 'chalk way'.
We’re going to start with the easiest and cheapest transfer method first: The ‘Chalk Way’.
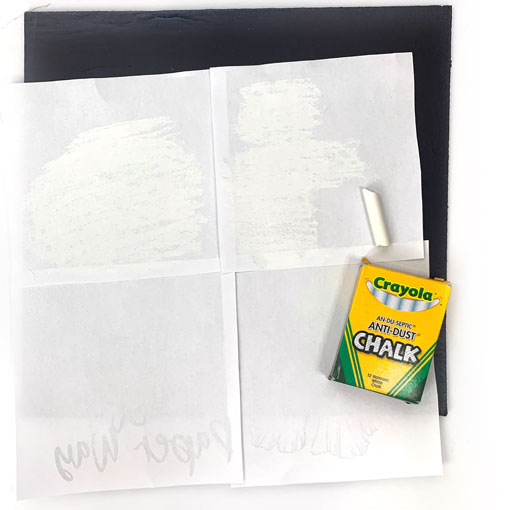
With this method, you simply grab a piece of regular, white chalk and cover the backside of your printed template.
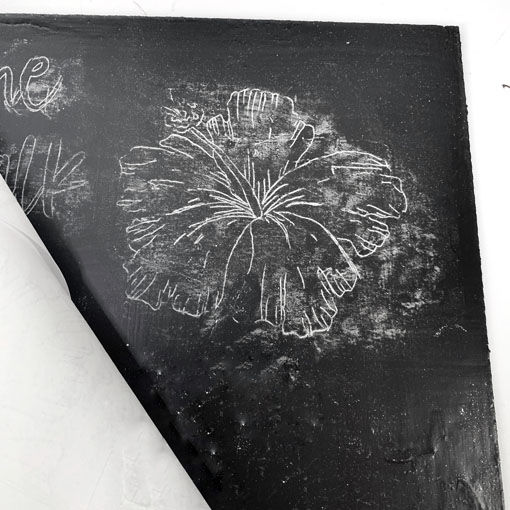
You then stick the paper to your chalkboard and trace over the design to imprint markings on the board that you can touch up later.
quick pros & cons.
| Pros | Cons |
|---|---|
| You don’t need any extra supplies. | The chalking part is time-consuming, especially if the sign is complex. |
| Easy cleanup of chalk markings (just use a pencil eraser). | It can be hard to know if you put enough chalk on the template. |
| The cheapest method. | The transferred markings/lines may be blurry and not exact. |
note.
supplies you need.
- Your Printed Template
- Chalk
- Scissors and Tape
- Pen
- Chalk Markers
- Ruler (optional)
- Washi / Painter’s / Ruled Tape (optional)
the process (chalk way).
- Print out your design template and tape it together (it needs to match the same size as your chalkboard).
- Turn your template over so the backside is facing up.
- Take your chalk and cover the whole backside (make sure to at least cover the design objects).
- Hold your template up to the light to ensure your chalk covers any part with a design on the front side.
- After all your chalk is applied, flip your paper over (face up), and align it perfectly over your chalkboard.
- Once you have it in place, tape it down securely with washi or painter’s tape (you may need to use a ruler to straighten the pages).
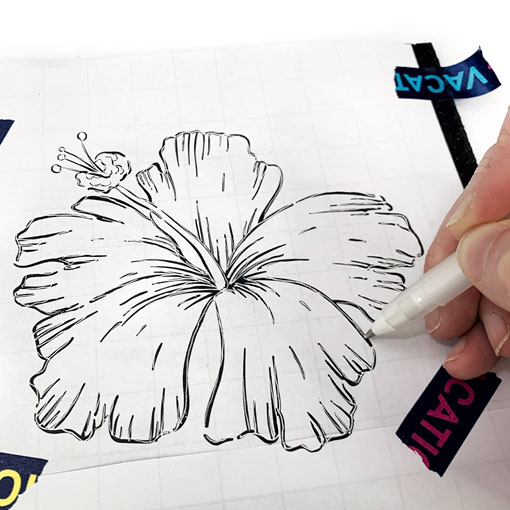
- Use any pen (I use a white gel pen), and trace over the whole design of your template — don’t press too hard and indent your chalkboard, but press hard enough to make sure the chalk transfers to the next page.
- Check your progress, by carefully lifting a corner of the page to make sure your chalk marks are transferring to the board.
- Finish tracing over the template, and make sure to trace over all the outlines of objects, as well as areas with different color tones (hue) and saturation.
- Then carefully remove all the taped paper.
- Now you’re ready to use chalk markers and write directly on your chalkboard!
pro tip.
That’s all there is to it.
Just add chalk to the back of a paper design, then trace over it.
But don’t forget:
The con with this method is that it can be hard to transfer clean lines to your board.
Luckily there’s a solution — transfer paper.
3. the ‘transfer paper way’.
Want to know the secret to transferring super crispy lines to your chalkboard?
This is where transfer paper joins the party.
And it’s a GAME CHANGER.
In this second method, instead of chalking the back of your printed template, we’re going to slip a sheet of transfer paper between your printable and chalkboard.
And then simply trace on top of the printable…
quick pros & cons.
| Pros | Cons |
|---|---|
| Only one extra supply needed (transfer paper). | Transfer paper lines are harder to erase. |
| You can reuse transfer paper several times. | Perfect alignment takes a bit of extra time (using a ruler helps keep it exact). |
| Lines are very crisp and easy to trace on your chalkboard. | It’s harder to execute on extra-large boards. |
supplies you need.
- Your Printed Template
- White Transfer Paper
- Scissors & Tape
- Pen
- Chalk Markers
- Ruler (optional)
- Washi / Painter’s / Ruled Tape (optional)
- Eraser (optional)
the process (transfer paper way).
- Print out your design template and tape it together (it needs to match the same size as your chalkboard).
- Grab your transfer paper and roll out as many sheets as you need to completely cover your board.
- Lay the sheets (chalky-side down) on your chalkboard, and tape down the edges to secure them in place.
- Lay your template face up over the transfer paper (you can grab a ruler to confirm your design is centered and level).
- Once you have it in place, tape it down securely along the edges with washi or painter’s tape.
- Use a pen to trace over every element of your template design (I use a white gel pen).
- After every element is traced, remove both your template and the transfer paper.
- Roll up your transfer paper and save it for another day (you can use it several times).
- Now you’re ready to use chalk markers and write directly on your chalkboard — trace over your imprinted design with a chalk marker and add color if needed.
pro tip.
Now for the ultimate way to transfer your chalkboard design…
4. the ‘projector way’
Imagine this:
You never have to print templates, mess with your home printer or buy extra ink.
Wouldn’t that be nice?
That’s where a projector comes into play.
Yes, a projector is expensive, but it’s 100% digital and a must for extra-large projects (like a wall).
And it’s easier than you think…
In this third method, you’re going to need a printed design image saved to your smartphone.
pro tip.
quick pros & cons.
| Pros | Cons |
|---|---|
| You can see your tracing progress as you go (and chalk pencil is easy to erase). | Projector is a larger investment than the other options. |
| No printing any pages, or cutting and taping. | Aligning the projector onto the chalkboard can be time-consuming. |
| You can immediately view your design on the chalkboard (before tracing starts). | The more lighting in the room, the harder it is to see the projection. |
supplies you need.
- Portable Projector (with phone connection cord)
- Phone (with your sign image)
- Chalk Pencil
- Chalk Markers
- Chair
- Ruler (optional)
- Washi / Painter’s / Ruled Tape (optional)
- Eraser (optional)
pro tip.
the process (projector way).
- In Canva, save your design as a PNG image with both a white and black background to your computer.
- Send your PNG images to your phone by email, AirDrop, Pushbullet, text message, etc.
- Grab your chalkboard and lean it against an open wall area.
- Put your projector on a chair (or another raised surface) facing towards the board.
- Plug your mobile phone into the projector and open up your design image on your camera roll (choose either the white or black background image, depending on which one is more visible on the board).
- Adjust your projector height and focus settings to get the picture to fit perfectly on the chalkboard (this can be tricky, but take the time to get it right so it won’t budge during the transfer process).
- Grab a chalk pencil and trace over as many details and outlines of your projected images as you can on the chalkboard.
- Now turn your projector off.
- Make sure your chalk pencil outlines look good, then trace them in chalk marker (more permanent) to finish your board design.
Not too hard right?
All we are doing here is projecting an image and using a chalk pencil to get your guidelines in place, then using a chalk marker to finish the design in full and to add color.
Don’t forget:
You may need to elevate the projector (on your chair or another surface) AND move the base of your chalkboard further in & out from the wall, to get your projected image to fit just right.
(Just play with all the angles a bit, and you’ll get it right. 👍)
note.
wrapping up.
Who said transferring a chalkboard design was hard?
Let’s recap what we’ve learned:
There are 3 methods you can choose from when transferring a design to your chalkboard.
Use the Chalk Way, if you’re on a budget and your printed design is not too complex.
Use the Transfer Paper Way, if you want cleaner markings to help you draw your final design.
Last but not least, use the Projector Way, if you want to go digital and have a large project.
Before you go:
What images, fonts, or letters are you going to make?
What are you making your sign for — your home, classroom, store?
Let me know in the comments below. 👇
transfer faqs.
Have questions? Check out these helpful answers.
leave a comment.
Share your thoughts below — you opinion matters.

